If you're still using Excel for some of your data and lists, don't worry, we understand. Monday.com is here to help you make the transition smoothly. You can import your data from Excel to Monday.com or export your data from Monday.com to Excel if you're not ready to give up just yet.
Import your data from Excel
In just a few simple steps, you can convert your Excel data into tables on Monday.com. Follow our step-by-step guide or watch the video to find out more:
Note: Only the first sheet of your Excel file will be imported.
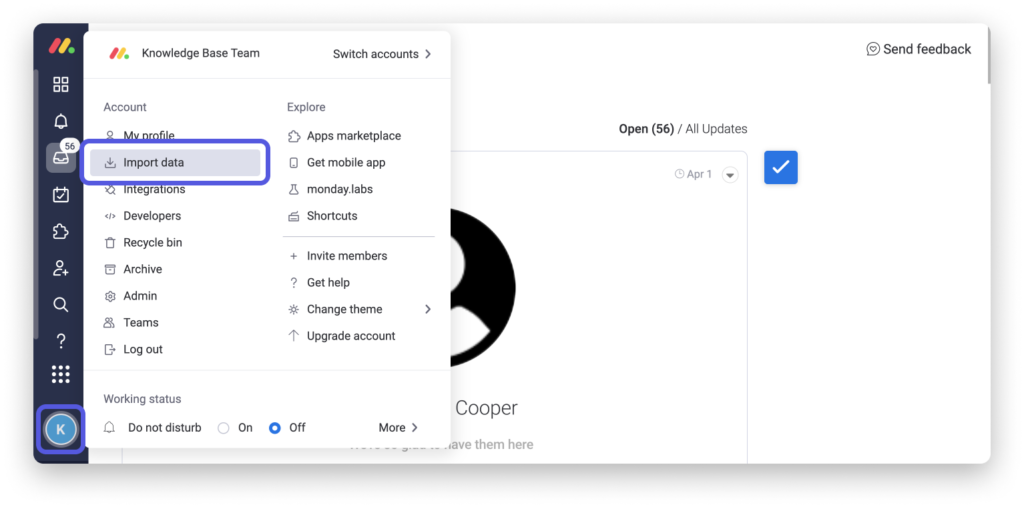
To import your data, click on your profile picture and select "Import data" :
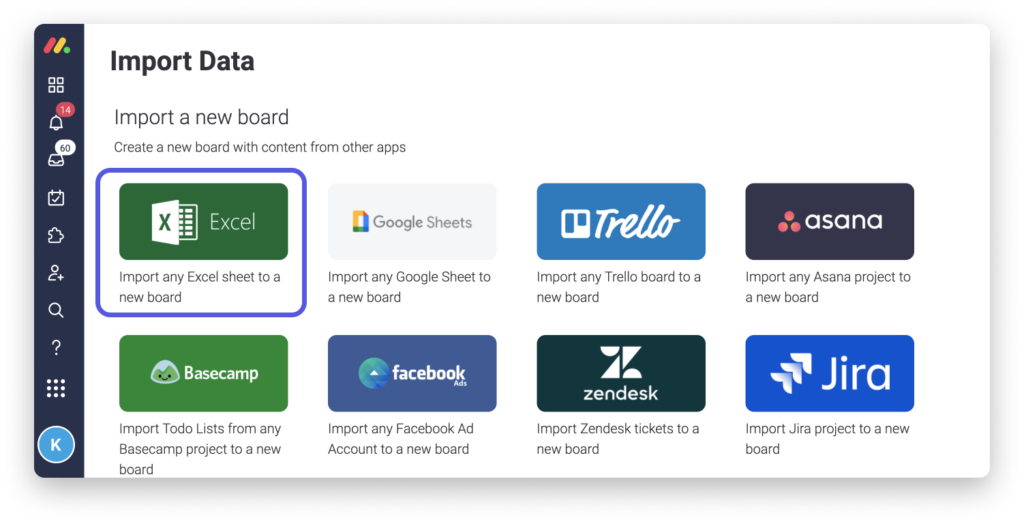
Choose "Excel" as source:
You can either drag your Excel file into the central window, or click to browse your documents and select your Excel file.
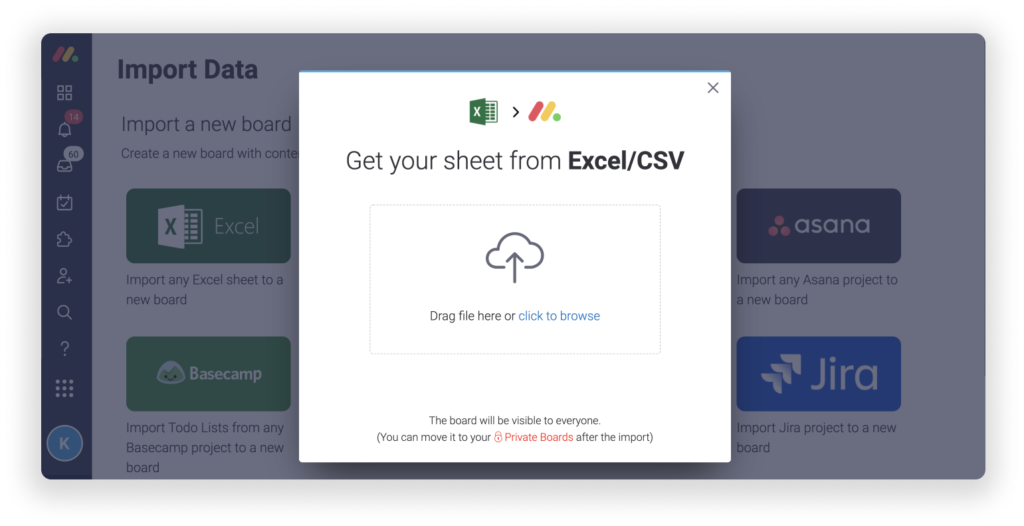
Note: Your Excel or CSV spreadsheet must contain more than one column for the import to work correctly.
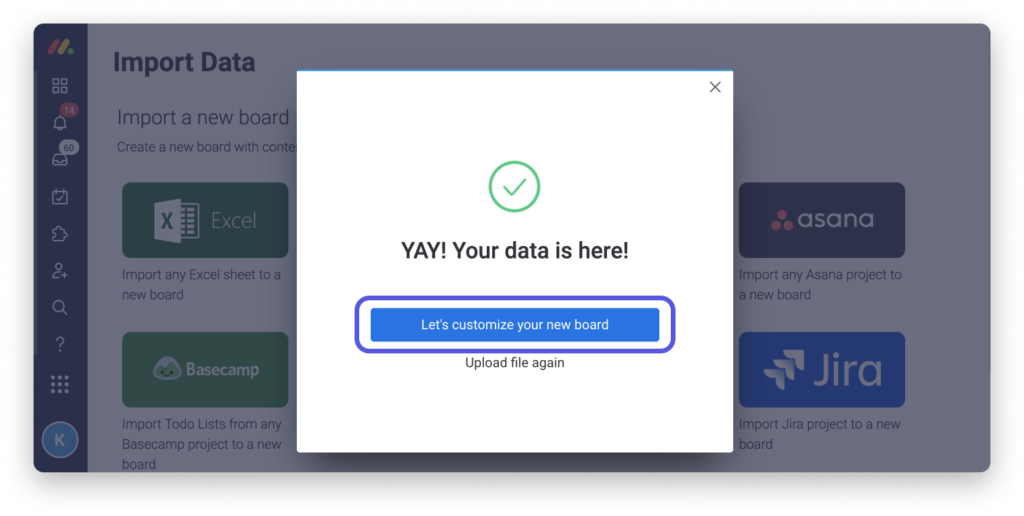
Once you've selected the file, your data is imported and you can click on "Customize your new table" to adjust the display to your preferences.
Select the row in your Excel worksheet that will be used as the column header for your new table, then click "Next" :
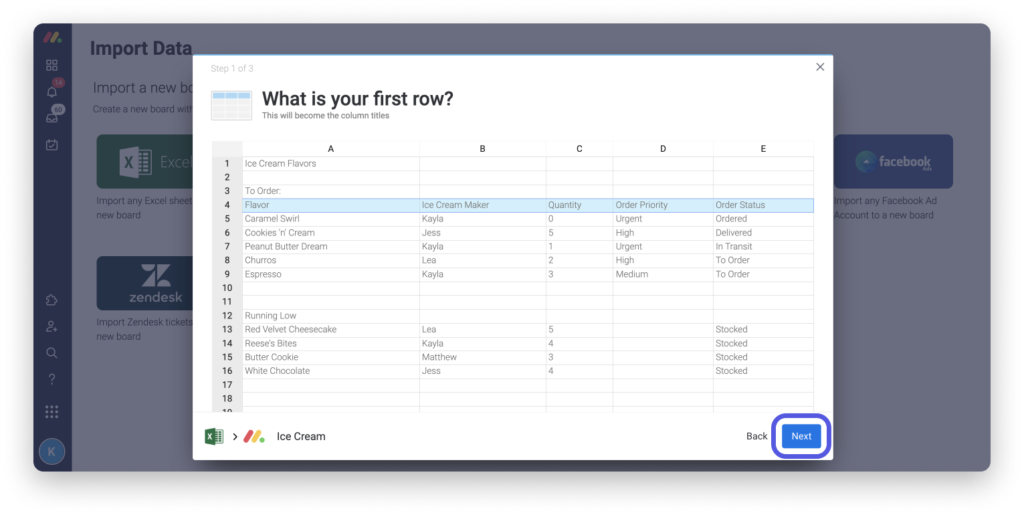
Anything above your first line will not be imported into your table.
Note: You can import up to 50 columns and 8,000 rows at a time. The following file formats are supported: .xlsx, .xls, .csv. Please note that XLSM files are not currently supported.
Select the column in your Excel spreadsheet that will become the first column in your table (the names of your items), then click "Next" :

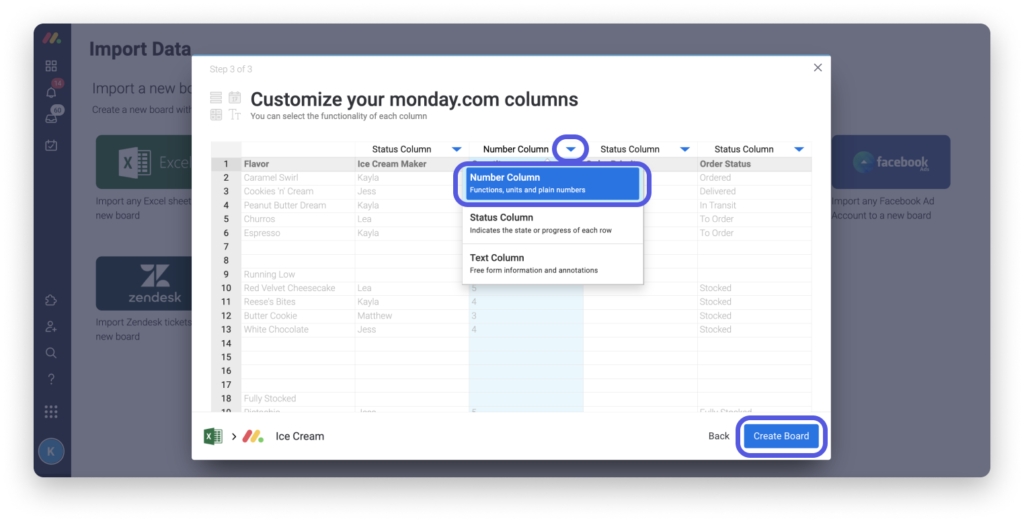
Our system will do its best to guess the column types corresponding to your data, but you can modify them manually using the drop-down menu for each column. You can import columns of the following types: Figures, Status, E-mailDate or Text. Once the data has been imported, you can also change the column type if required.
Finally, click on "Create table" to complete the import.
When importing dates, make sure they are in ISO format (YYYY-MM-DD), for example: 2021-10-23.
Import data into an existing table
There are many ways to import data from external sources such as Excel, Google Docs, Microsoft Word and many more. Save time by following these tips!
Import from Excel or CSV
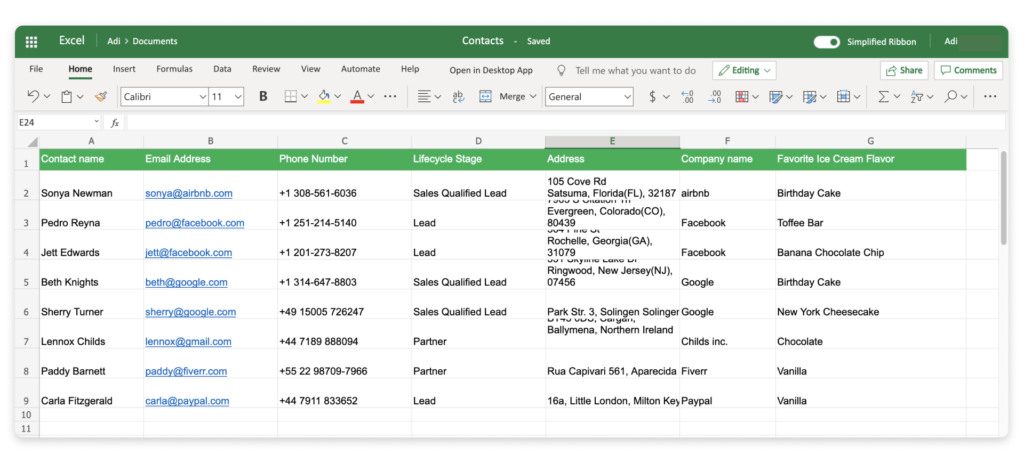
Let's take the example where you want to import the following Excel table into an existing table:
To import this data directly into your existing table, click on the arrow next to the blue "Add item" button above the table, then select "Import items" from the drop-down menu.
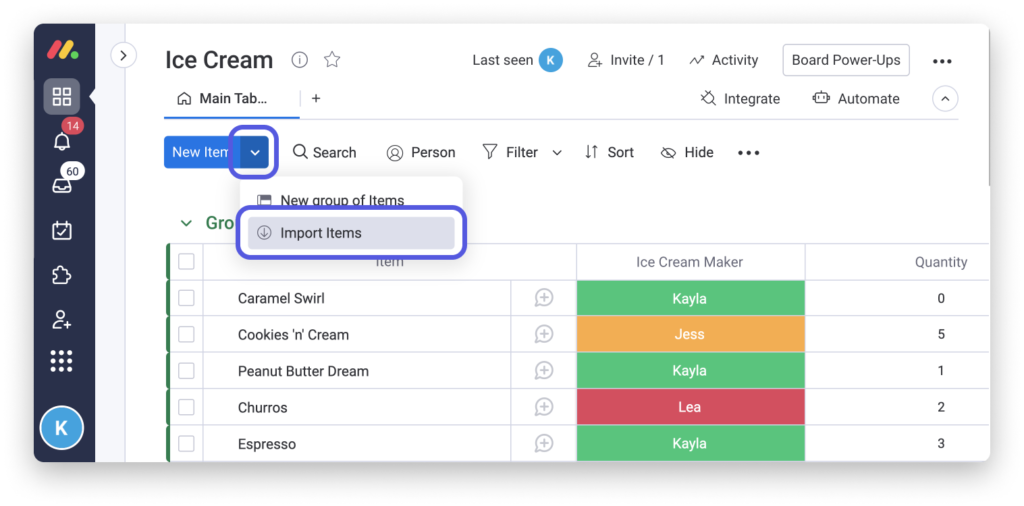
Note: Your "New item" button may be labelled differently depending on the context.
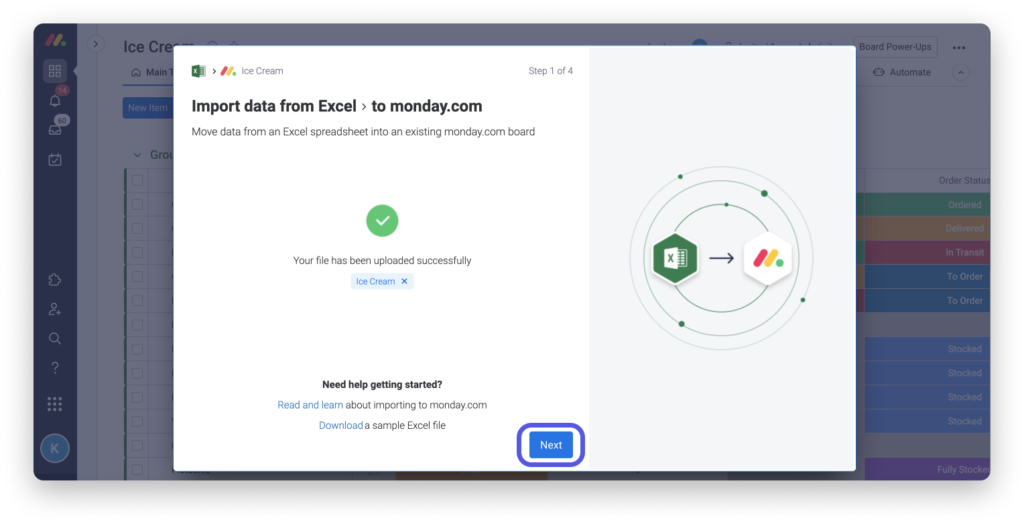
On the next screen, you can drag your Excel or CSV file into the box provided, or click on "Click to browse" to select the file on your computer. Once you've made your selection and successfully imported the file, click on "Next".
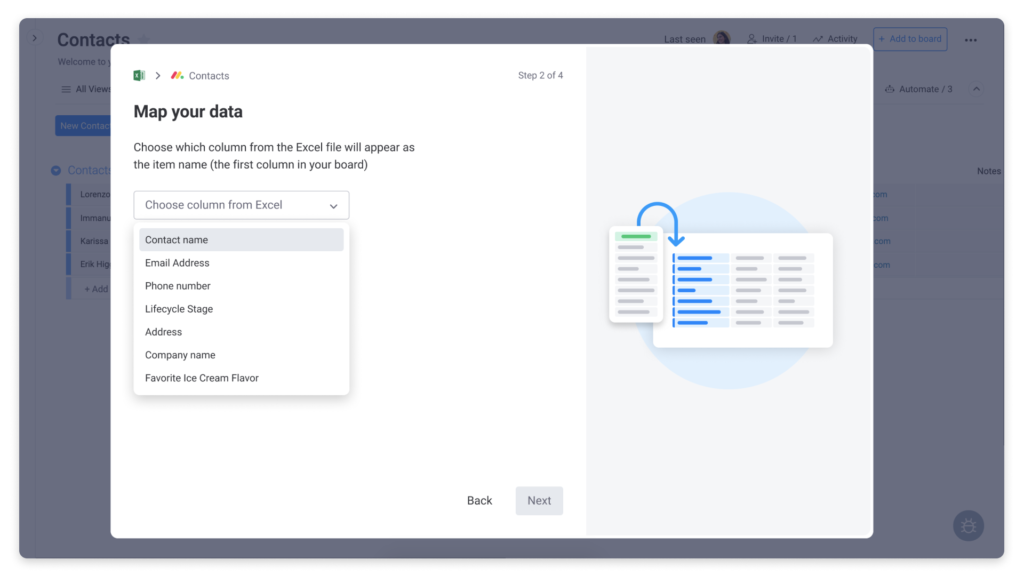
Next, choose the column in your Excel document you wish to display as the item name in your Monday.com table.
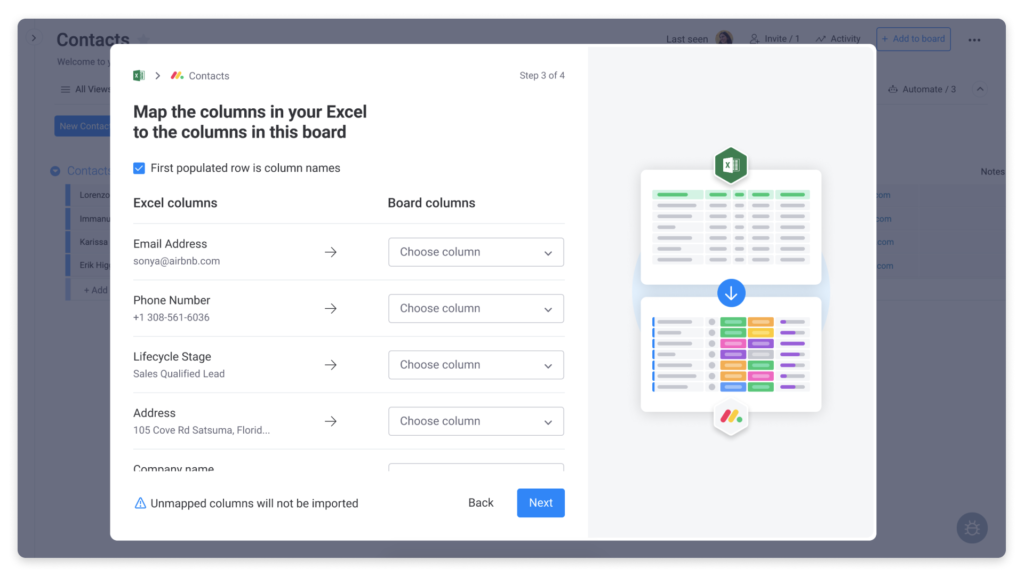
On the next screen, you'll need to match the columns in your Excel document to the columns in your Monday.com table. For example, you may choose to match the e-mail addresses in your Excel document with the "E-mail" column in your Monday.com table.
Non-matching columns will not be imported.
Note: Only the following column types are supported during import: Status, Numbers, Text, Date, E-mail and Phone. Other column types will not be updated during import, but can be modified at a later date.
Managing duplicate elements
Once you've matched your elements, you'll need to decide how to handle duplicate elements. There are three options to choose from.
In this example, we'll select the "Create new elements" option. Check the box corresponding to your choice, then click on the blue "Start import" button to continue:

And that's it! Your elements are being imported. You can close the window and continue working while all your elements are being imported.

Note: Don't forget that you can use the batch shares to make any necessary changes to labels.
Copy and paste groups of elements
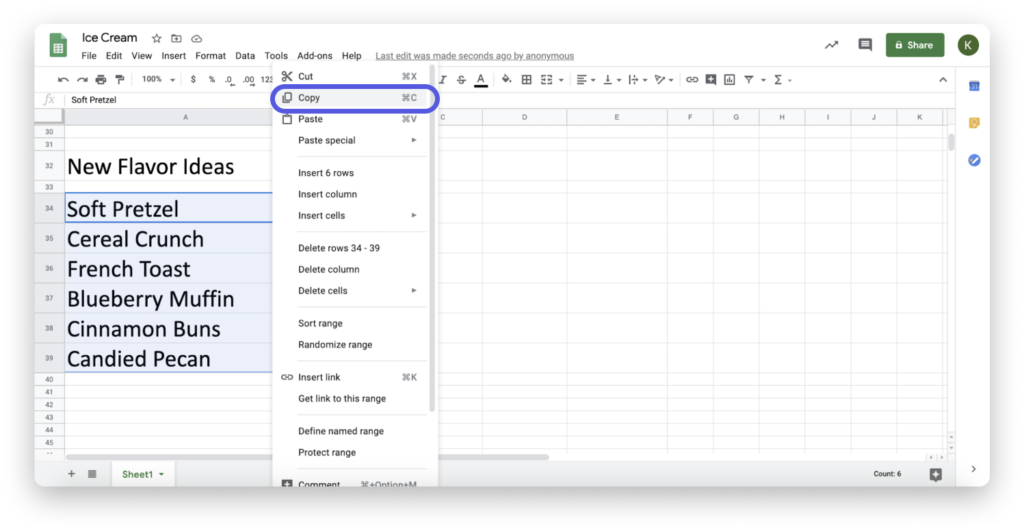
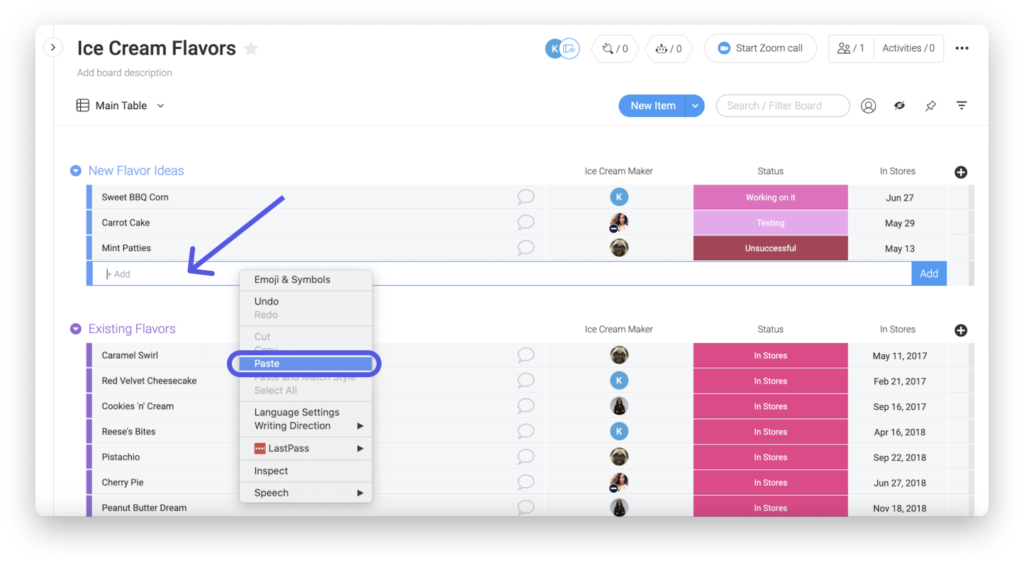
Suppose we've added some new ice cream flavor ideas to an Excel spreadsheet and want to transfer them to our "New Flavors" group in our "Ice Cream Flavors" table. With a single click, we can copy and paste multiple elements from our external source directly into our element group.
Simply select the items you wish to import, then use your keyboard shortcut or right-click to copy them like this:
Next, click on "+ Add" in the group where you wish to add these items. Finally, use your "Paste" keyboard shortcut or right-click and select "Paste", like this:
And that's it! All your items have been added to the table. You can click on the "X" in the menu below to deselect these items, or use batch actions to update them in your table.
Note: At present, this feature is only available for the first column of a table. You cannot therefore paste a list of data into other columns.
Exporting a table to Excel
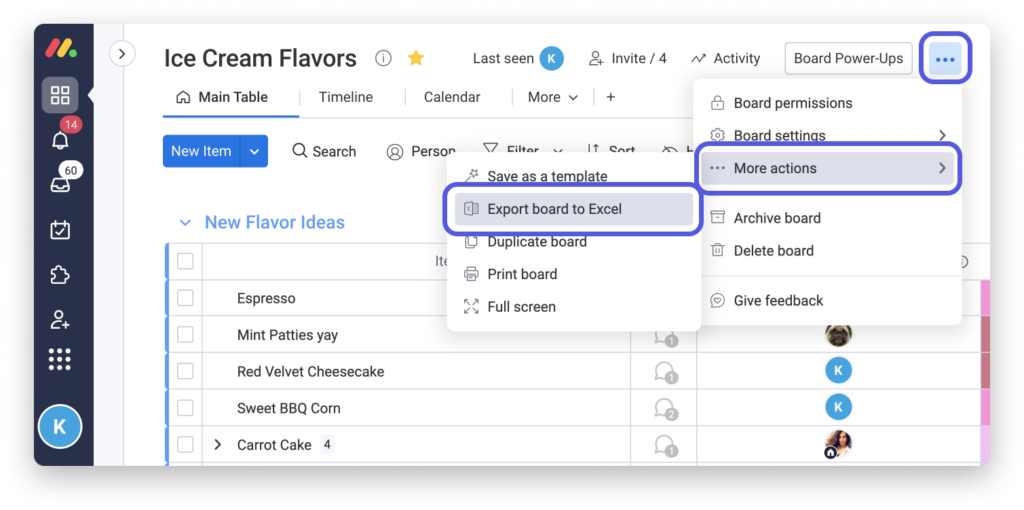
Exporting your table to an Excel spreadsheet is extremely simple! Simply click on the side menu at the top right of the table, then select "More actions" and "Export table to Excel". You can choose whether or not to include updates and their responses when exporting.
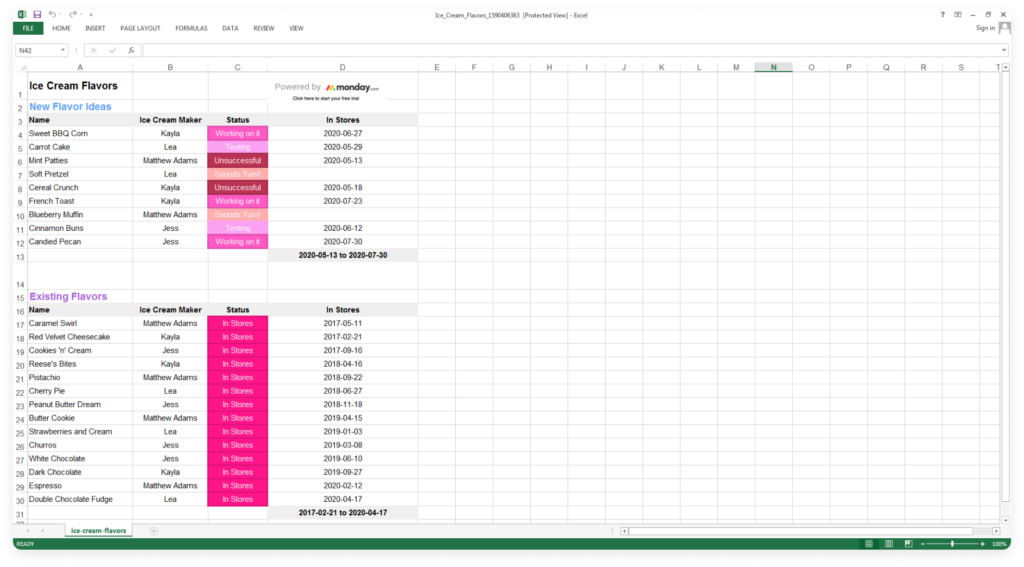
This is how your table looks when exported to an Excel spreadsheet:
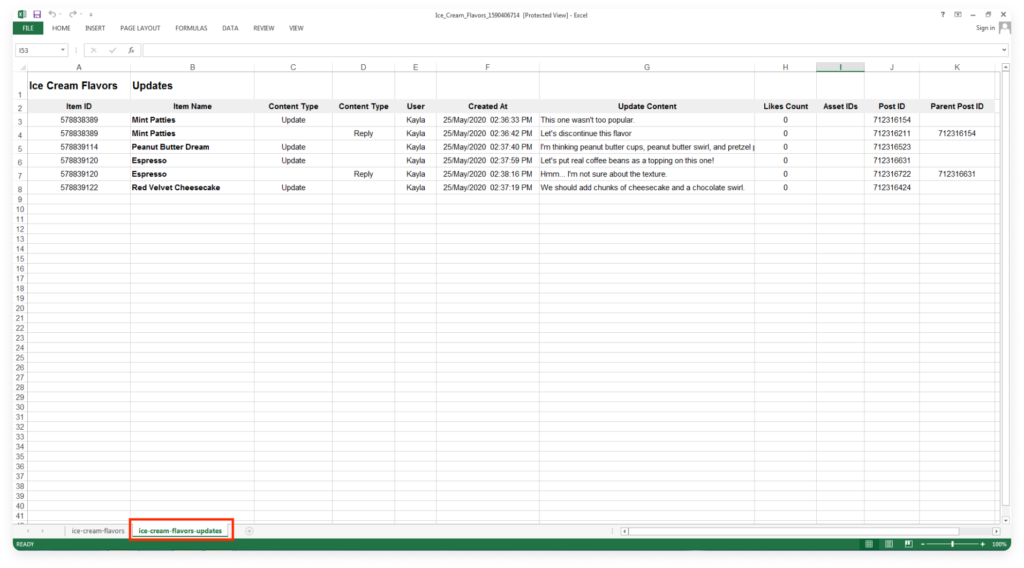
If you choose to include updates, you will see the table in one tab and all updates and responses in another tab of your spreadsheet, as shown below:
Note: If you have sub-elements in your table, only updates to the main element will be exported to Excel.
Export groups or items to Excel
You can export entire groups or specific items to Excel!
Exporting groups
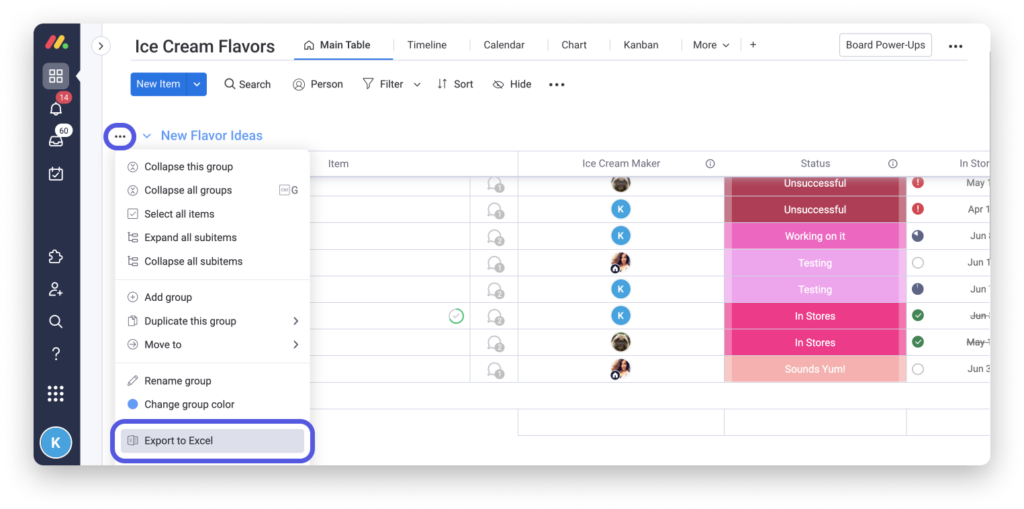
To export a group to Excel, simply click on the side menu to the left of the group name, then select "Export to Excel".
Exporting items
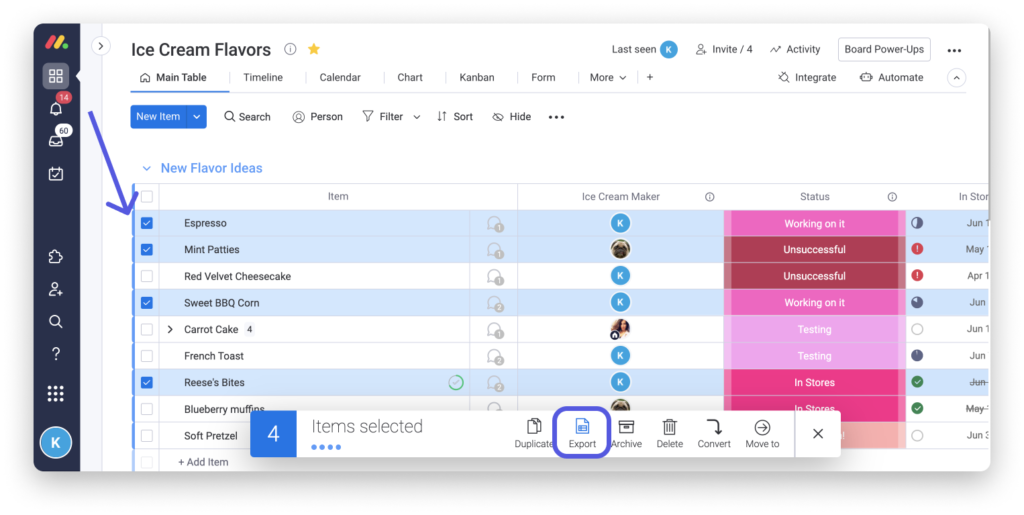
To export specific elements, select them using the batch actions. Then click on "Export" in the Batch Actions toolbar below.
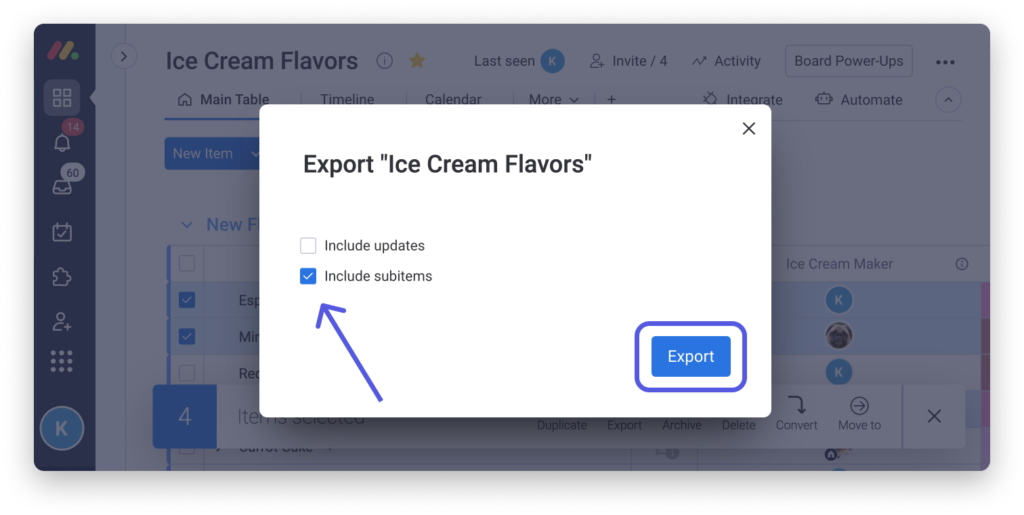
You will be asked to choose whether you wish to include or exclude updates and sub-headings in your Excel file.
Export your account to Excel
As administrator of your account, you have the option of downloading all your account data in a .zip file, which includes all tables and files, including private and shared tables. Each table will be downloaded as an Excel spreadsheet. If you'd like to know more about the detailed procedure, read our dedicated article. Otherwise, read on!
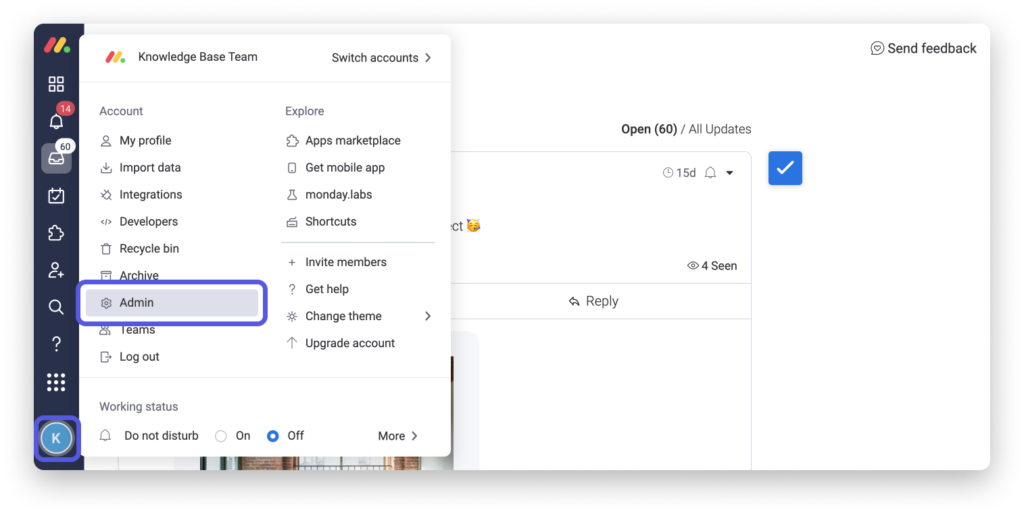
To begin, click on your profile picture and select "Admin".
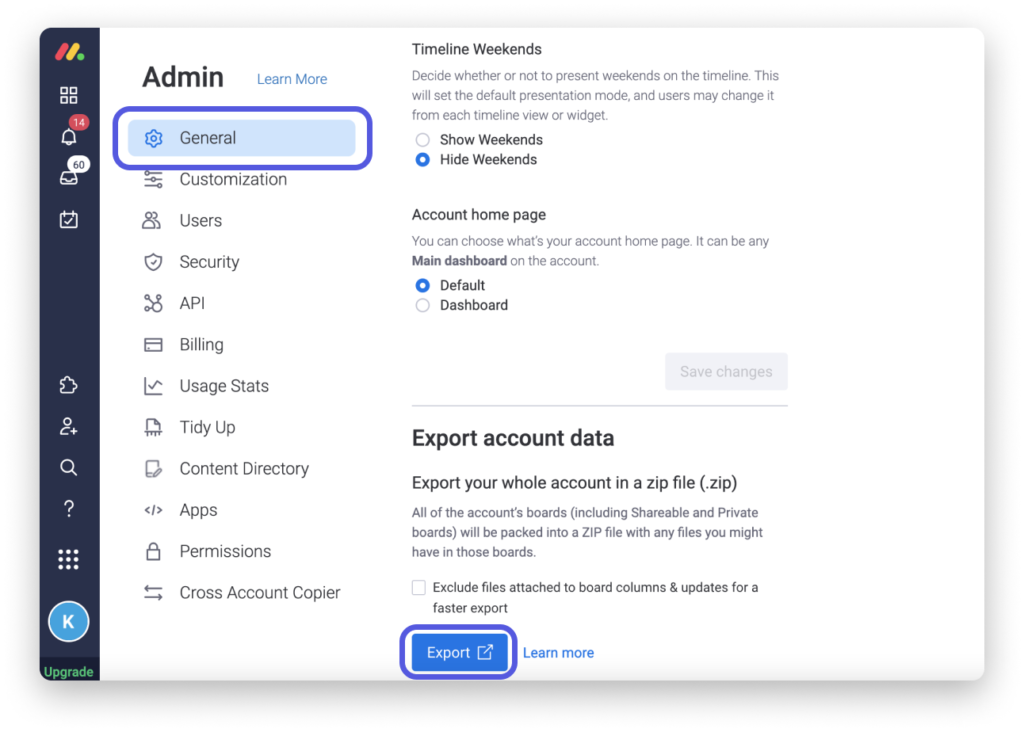
In the "Admin" section, under the "Account" tab of the "General" settings, scroll down to the "Export account data" section and click on "Export".
Note: Please note that this action does not currently apply to dashboards. However, don't worry, all the data in these tables comes from the individual tables that will be exported to your .zip file!
After a few hours, you'll receive an e-mail containing a .zip file with all your account data. Make sure you download it within 24 hours of receiving the e-mail, otherwise you'll have to repeat the process.
Source: https://support.monday.com/hc/fr/articles/360000219209-Importer-et-exporter-avec-Excel